This tutorial will explain how to install vRealize Automation (vRA) 8 using the vRealize Easy Installer. There are a couple of options as you go through which I will discuss here. This tutorial assumes you are using a Windows client but it can still be followed if you are using Linux or Mac, you will just need to run the relevant installer file.
vRA8 simplifies the application stack versus vRA7 by doing away with the Windows IaaS components in place of a self contained appliance. While this is true it does add it's own complexity.

vIDM (VMware Identity Manager) is embedded in vRA 7 appliance, which when vRA is clustered automatically clusters vIDM.

In vRA8 it is a separate appliance, there is no point clustering vRA8 appliances and leaving vIDM as a single appliance so this should also be clustered. To do so is where the extra complication comes in. Multiple vIDM appliances must be configured with a load balancer in front and according to some documentation requires an additional SQL server for the cluster. Some documentation suggests the embedded postgres database can be used but I have yet to test this.
1) Download the “vra-lcm-installer” ISO from VMware
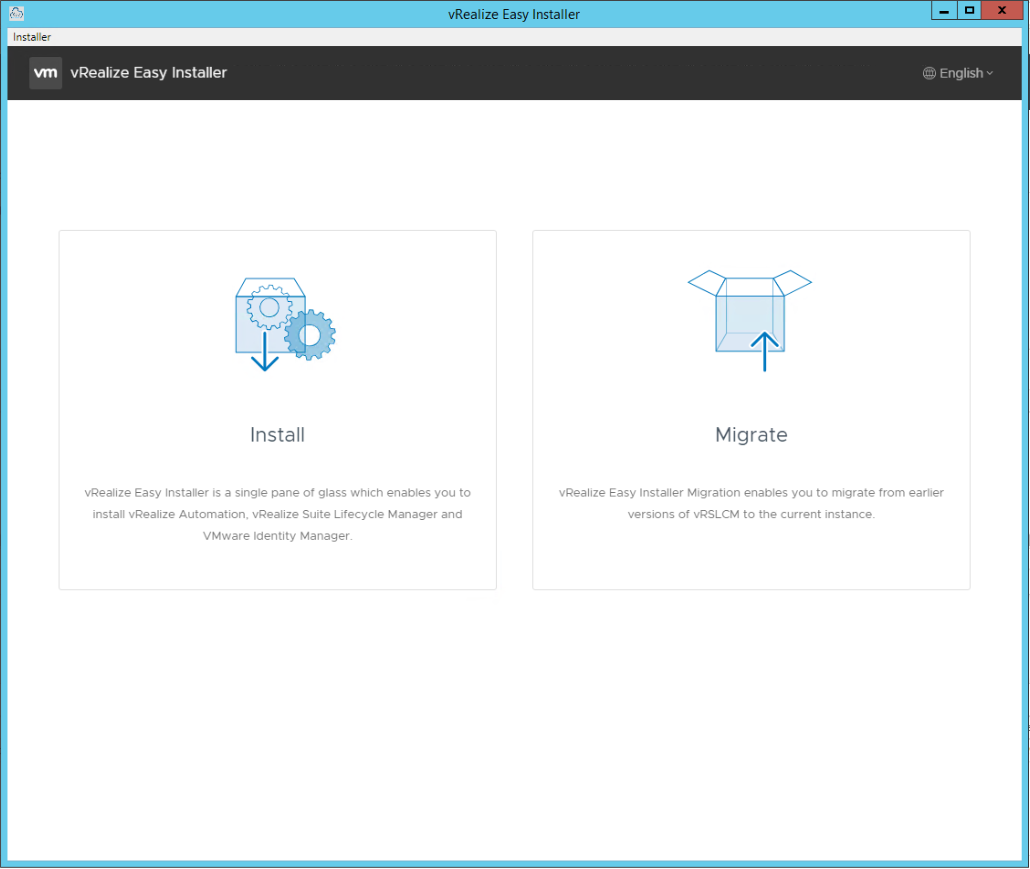
2) Once downloaded run the “installer.exe” located in the “.\vrlcm-ui-installer\win32\” folder. You will be presented with the below screen. You can perform a migration of a previously installed LCM (Lifecycle Manager), for this tutorial we will assume not and therefore click “Install”
Click “Next” on the Introduction screen

Accept the End User License Agreement and click “Next”

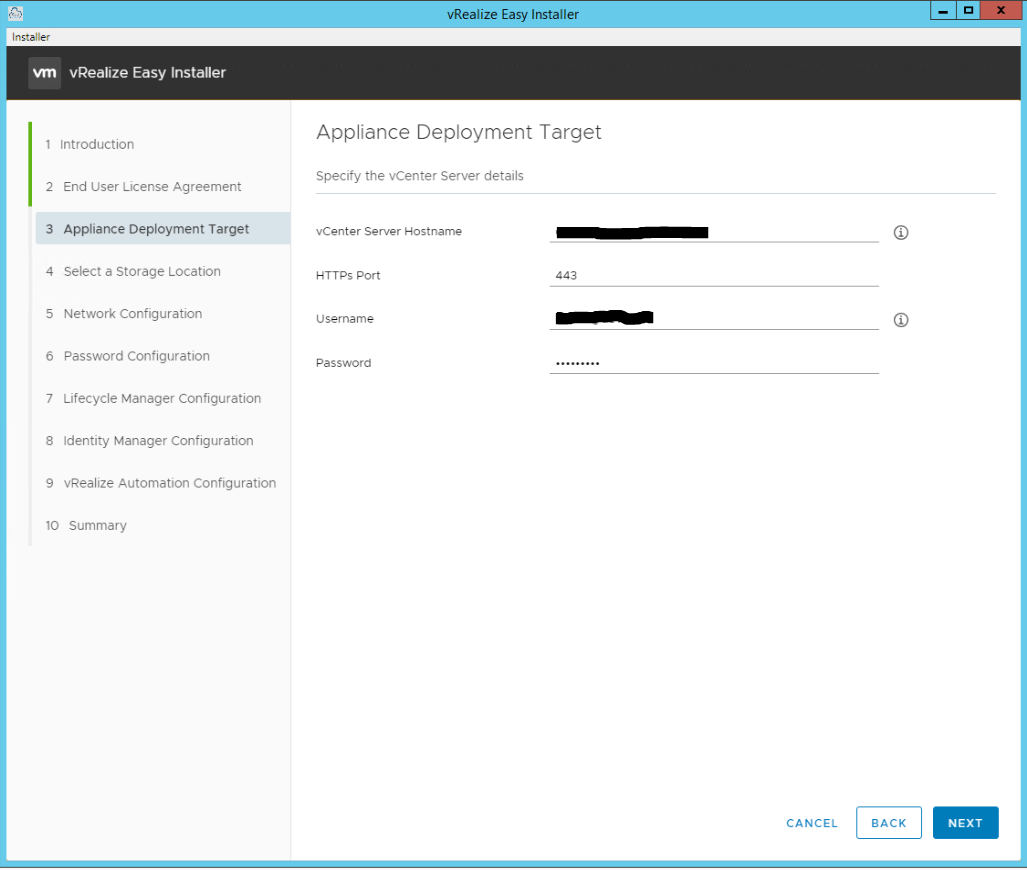
Enter your vCenter details and click “Next”
Accept the vCenter certificate

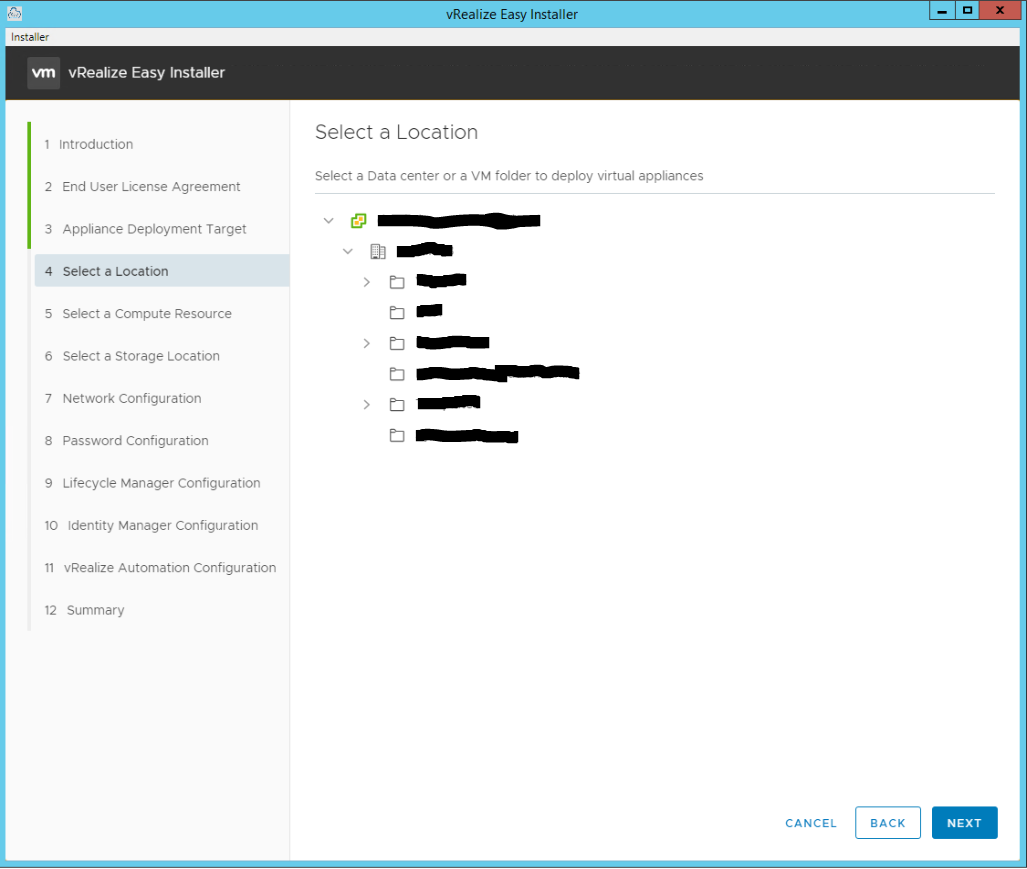
Select a vCenter folder for the appliances and click “Next”
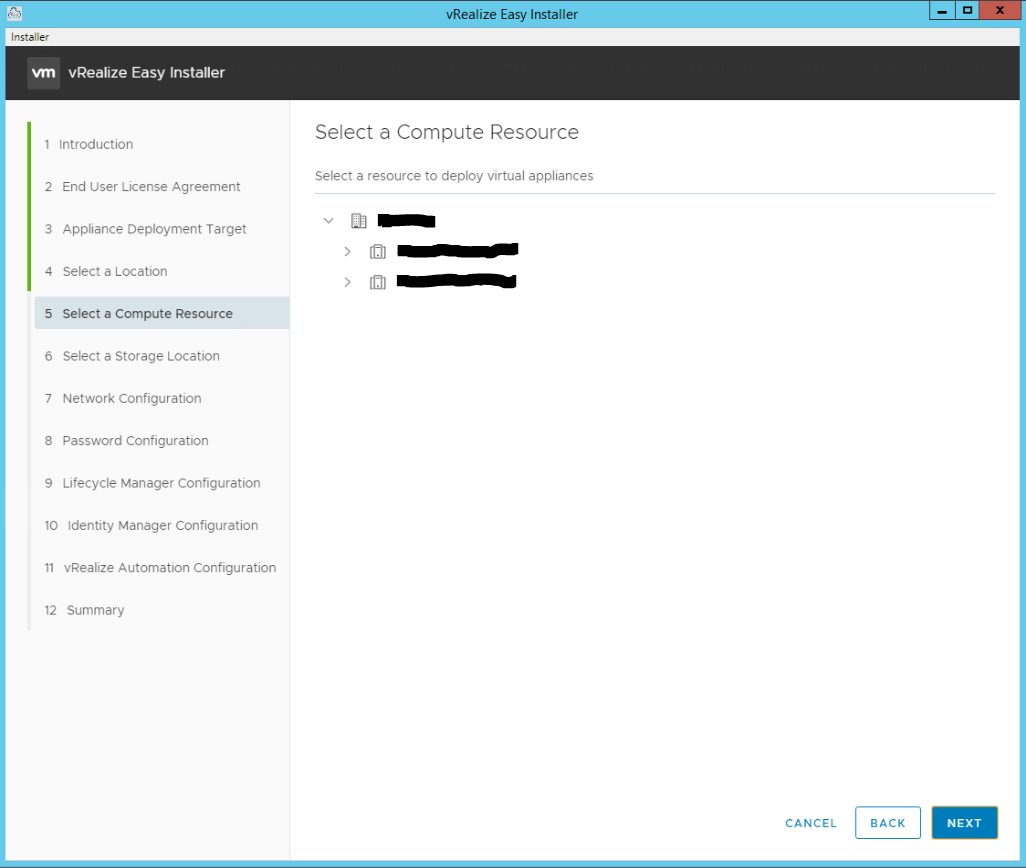
Select a Cluster in vCenter for the appliances and click “Next”
Select a Datastore in vCenter for the appliances, optionally select to “Enable Thin Disk Mode” and click “Next”

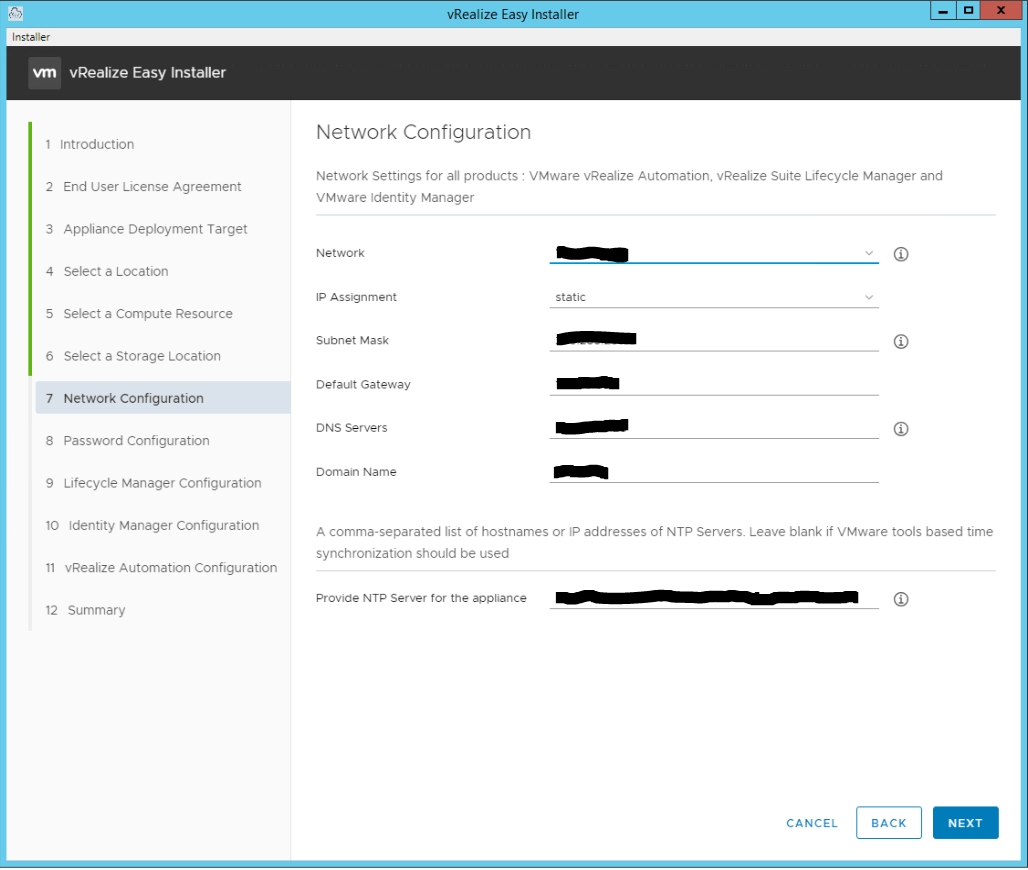
Select a Network and provide common details for the appliances and click “Next”
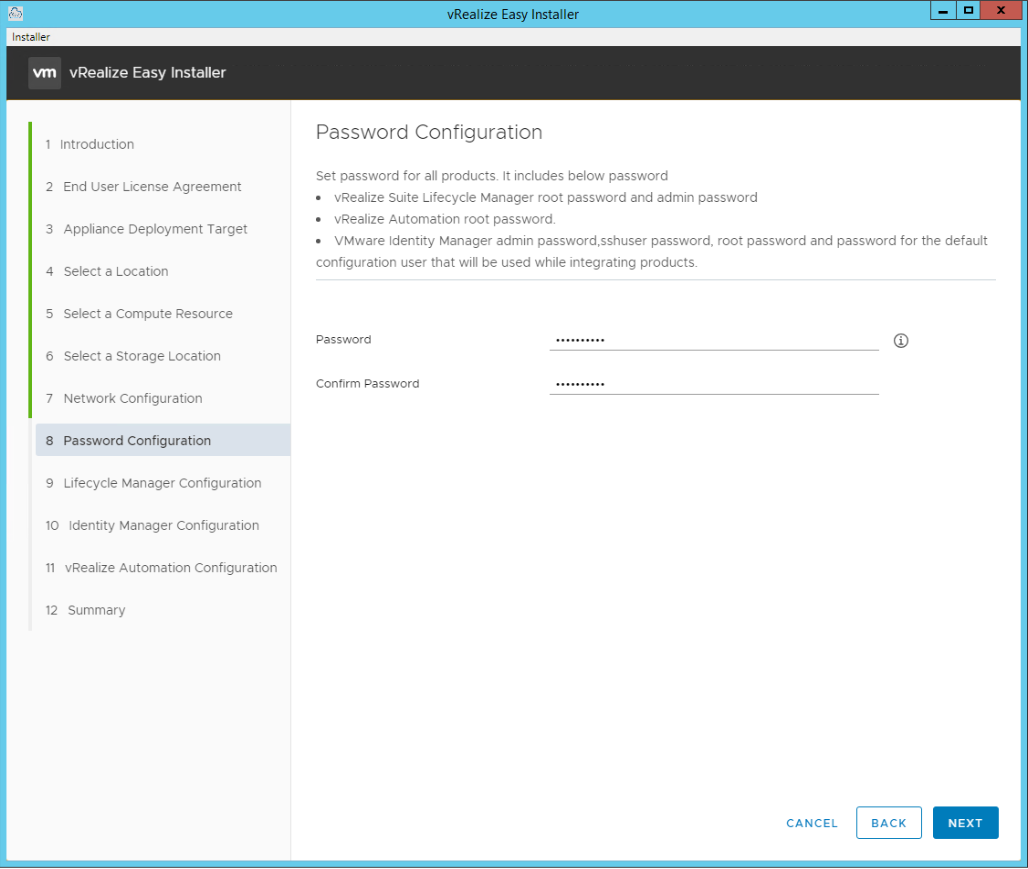
Enter a secure password and click “Next”
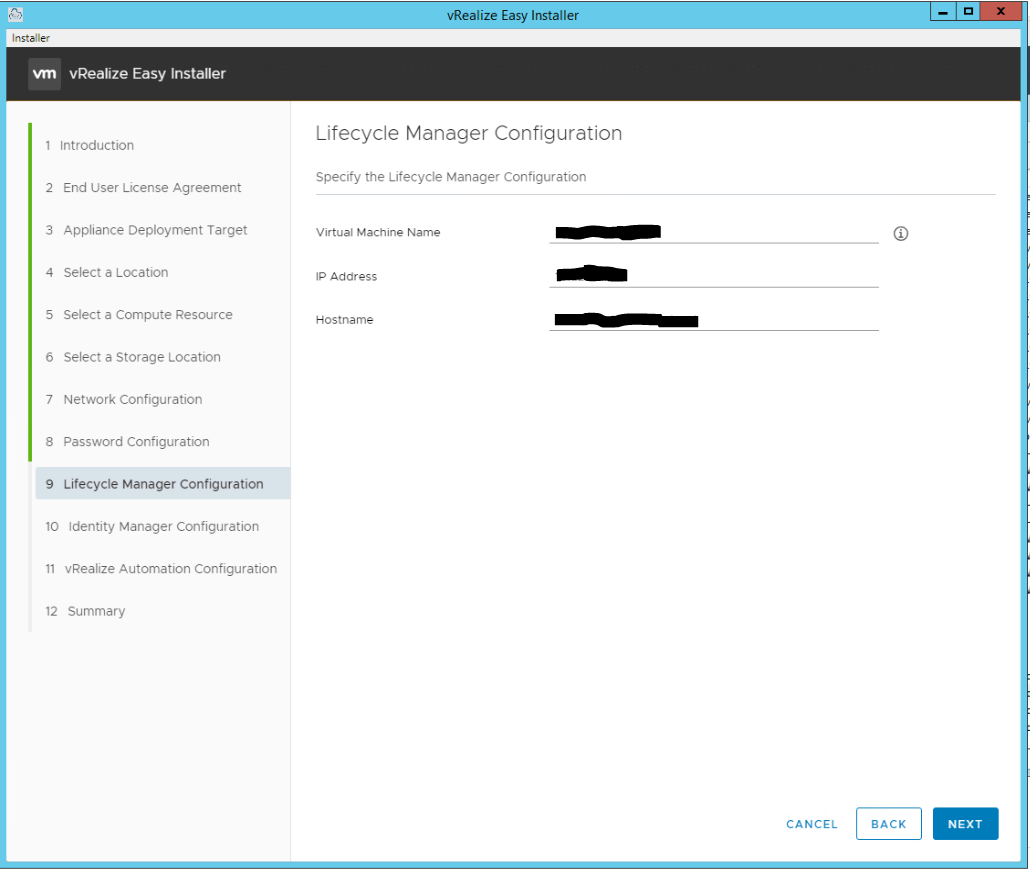
Enter details for the LCM appliance and click “Next”
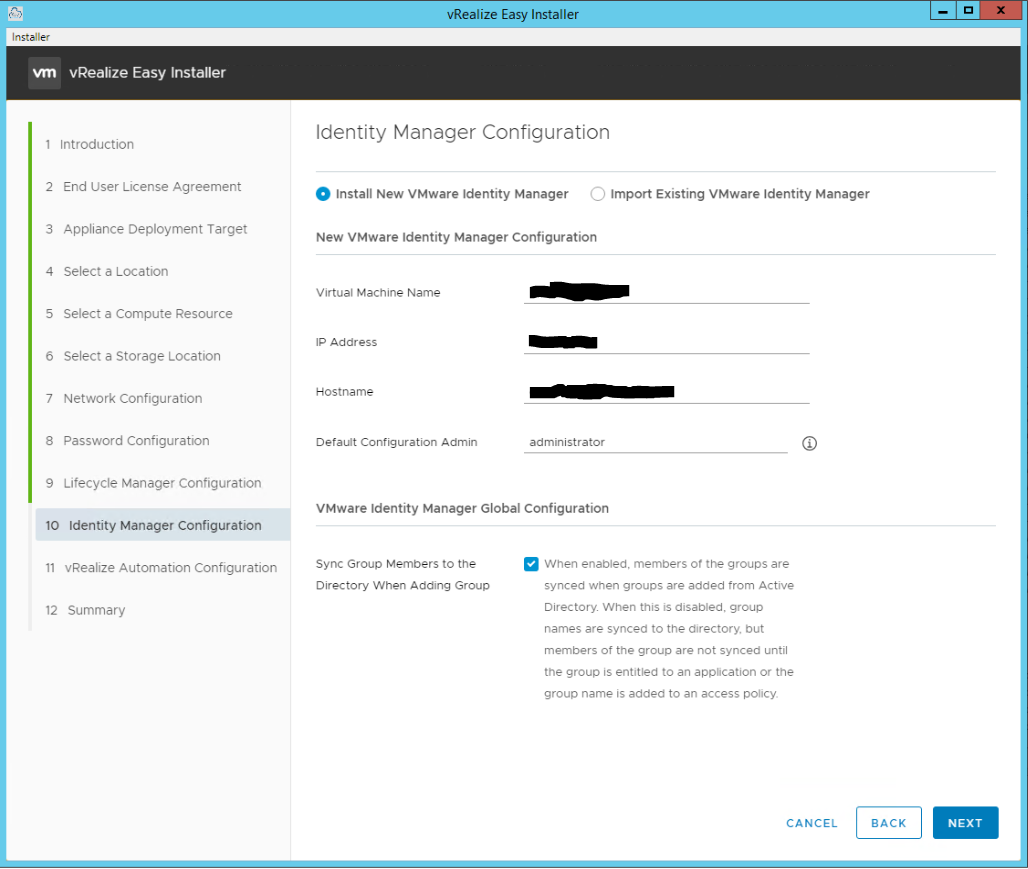
Select to “Install New VMware Identity Manager” if you don’t already have a vIDM 3.3.1 appliance/cluster. Enter details for the vIDM appliance and click “Next”
The vRealize Easy Installer will only install a single vIDM appliance. You will need to expand this to a multi node highly available (HA) cluster post deployment if required. Alternatively build a vIDM cluster and use the "Import Existing VMware Identity Manager" option. I will write a blog post on converting a single vIDM appliance to a vIDM HA cluster, watch out for it :)
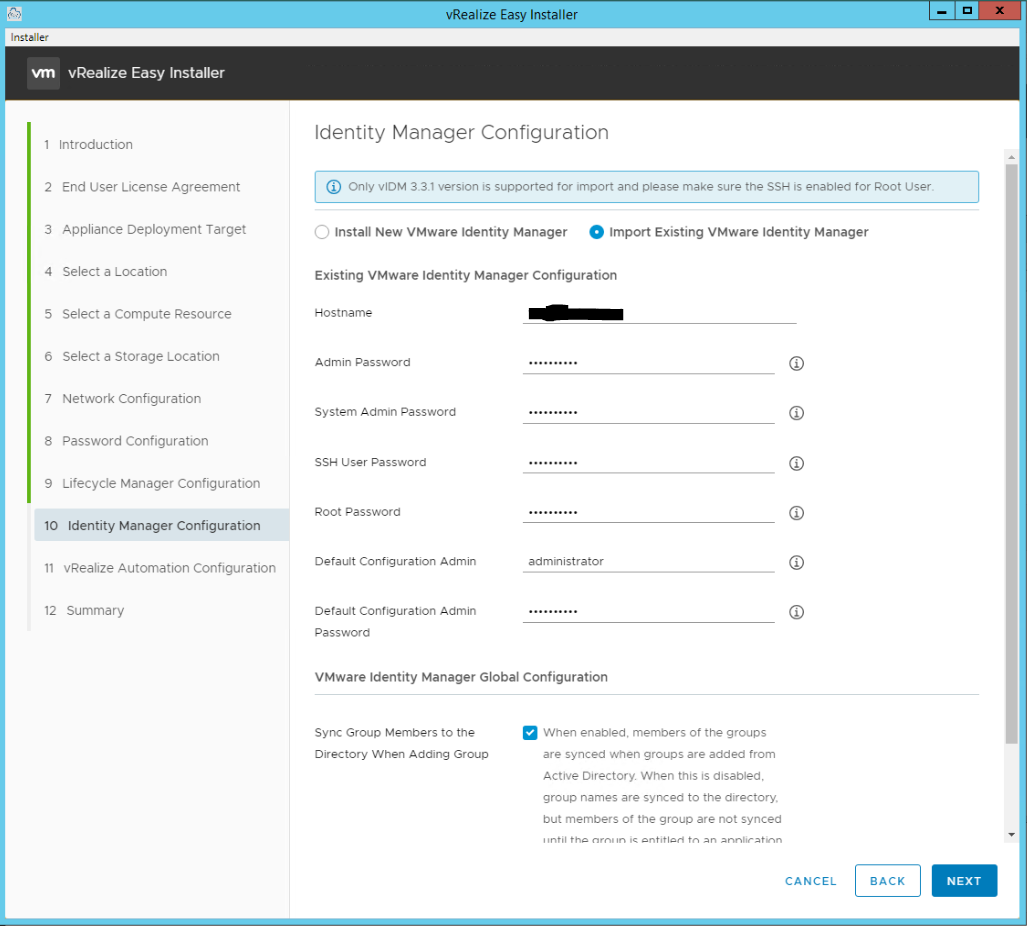
Select to “Import Existing VMware Identity Manager” if you already have a vIDM 3.3.1 appliance/cluster. Enter details for the existing vIDM and click “Next”
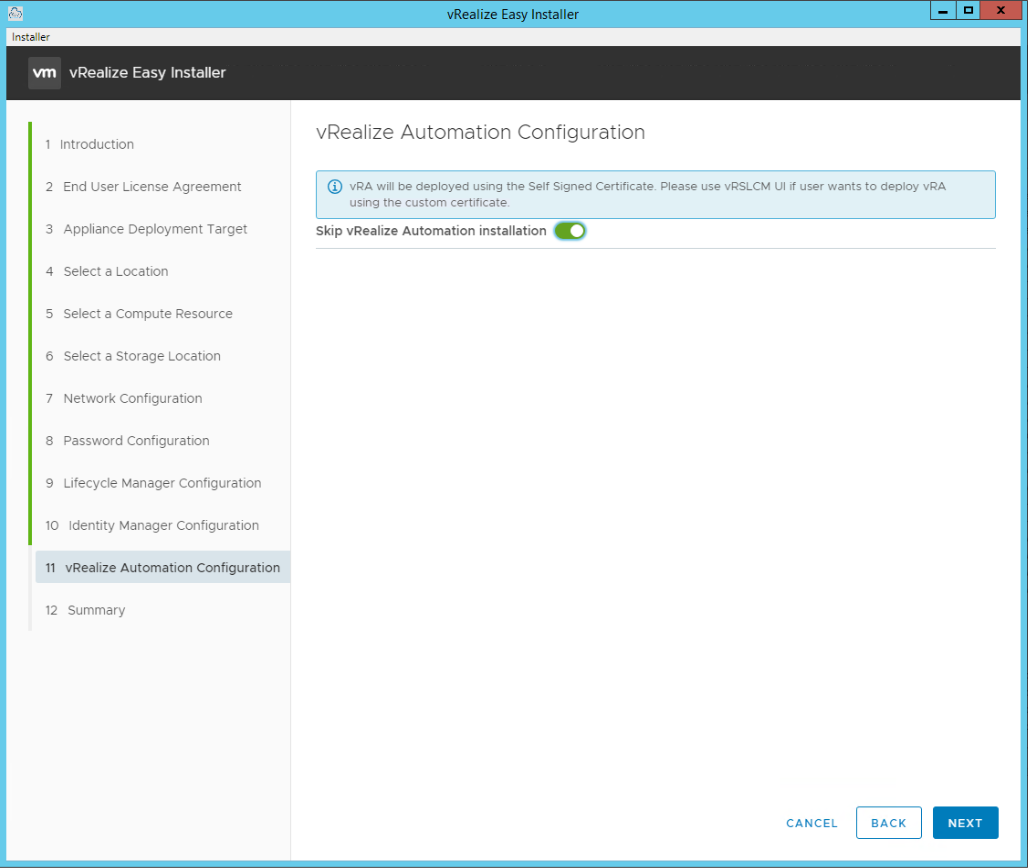
Select to “Skip vRealize Automation installation” if you want to deploy vRA using LCM later and click “Next”
Obviously this blog post covers vRA installation so this is not the step to follow for now if you want vRA deployed
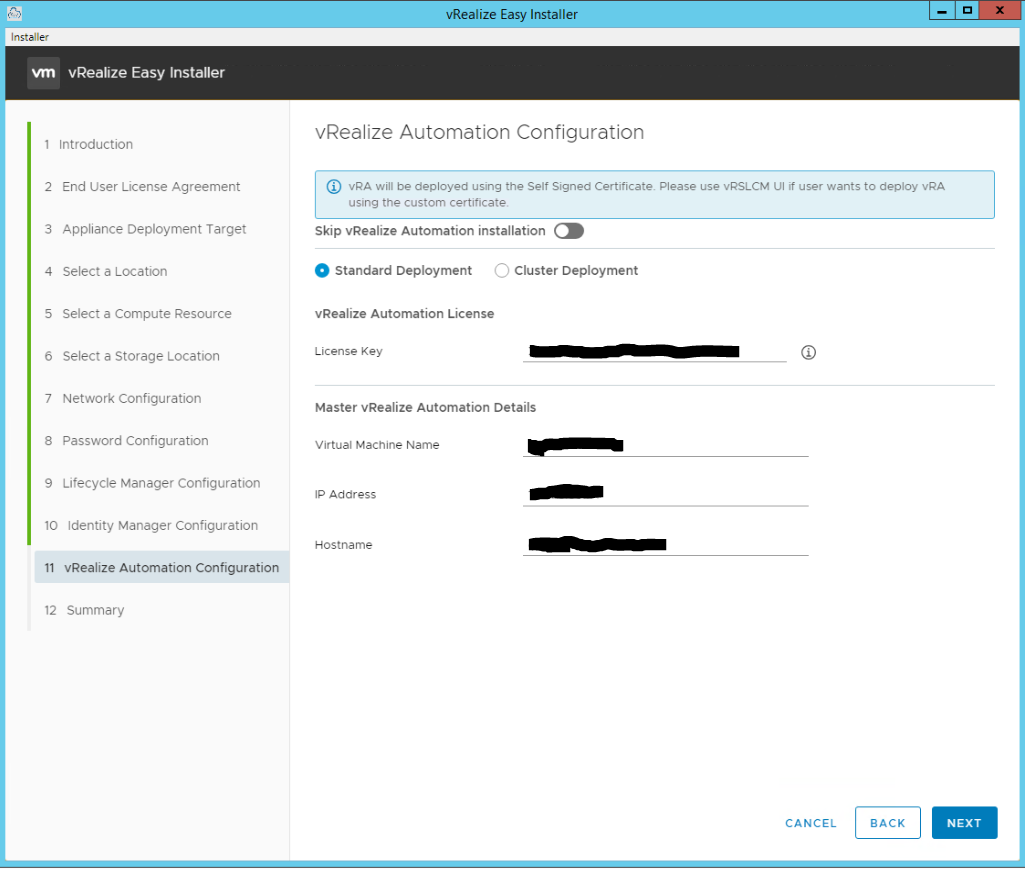
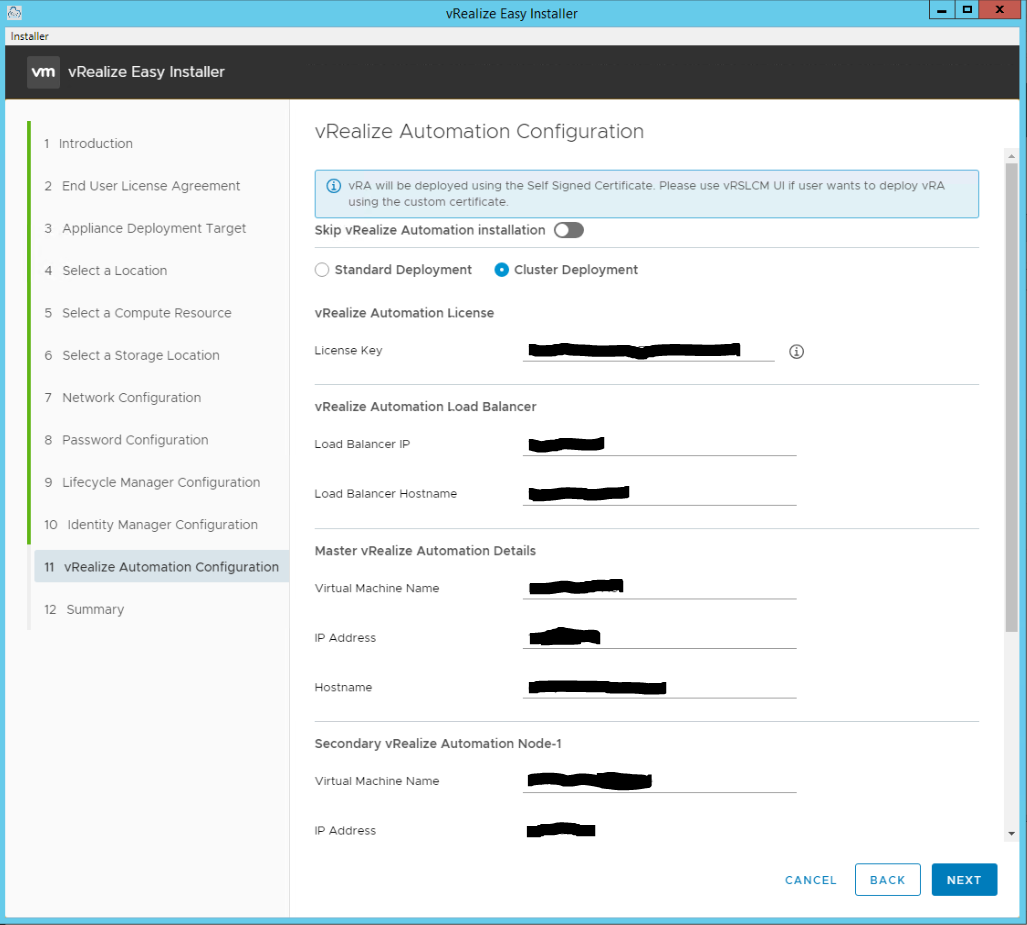
The vRealize Easy Installer allows the selection of a standard (single appliance) deployment or a cluster (3 node highly available) deployment. You can deploy a standard deployment now and extend to a cluster using LCM later if required.
Select the “Standard Deployment” option, enter a valid vRA license key (vRealize Suite 2019 for example), enter vRA appliance details and click “Next”
Select the “Cluster Deployment” option, enter a valid vRA license key (vRealize Suite 2019 for example), enter Load Balancer details along with 3x vRA appliance details (master plus 2x slaves/replicas) and click “Next”
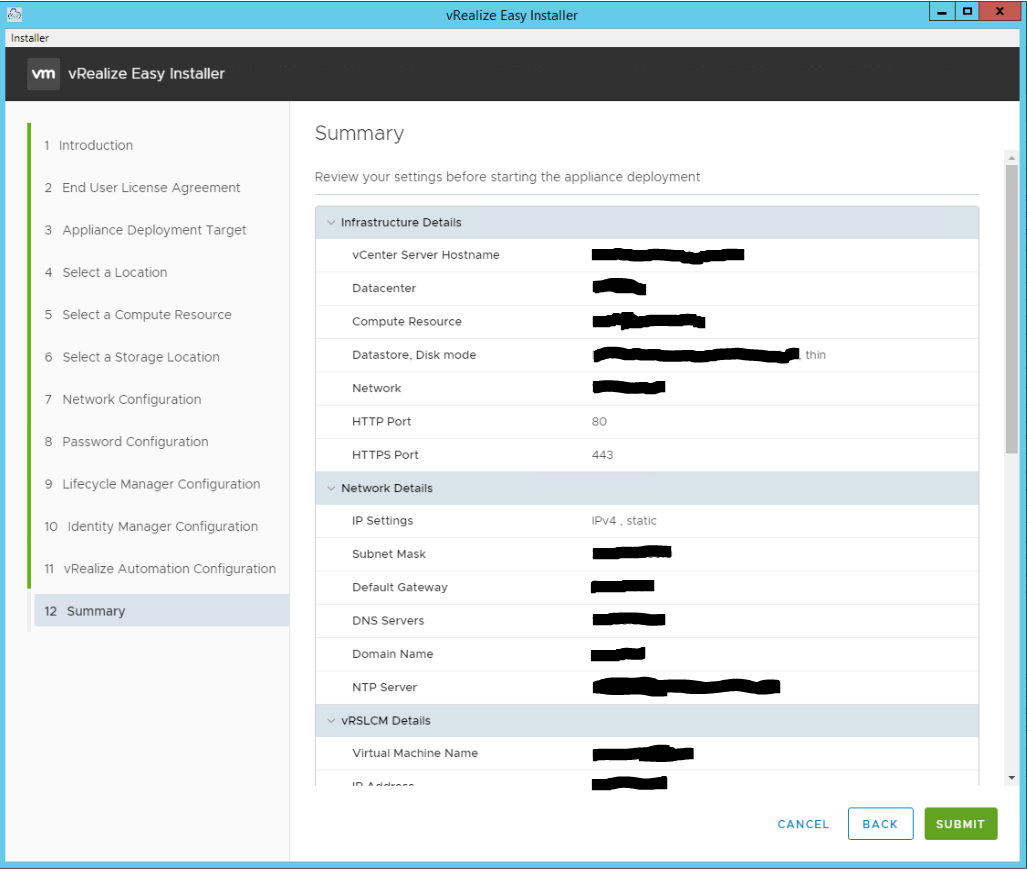
Check all the details are correct on the Summary page before clicking “Submit”
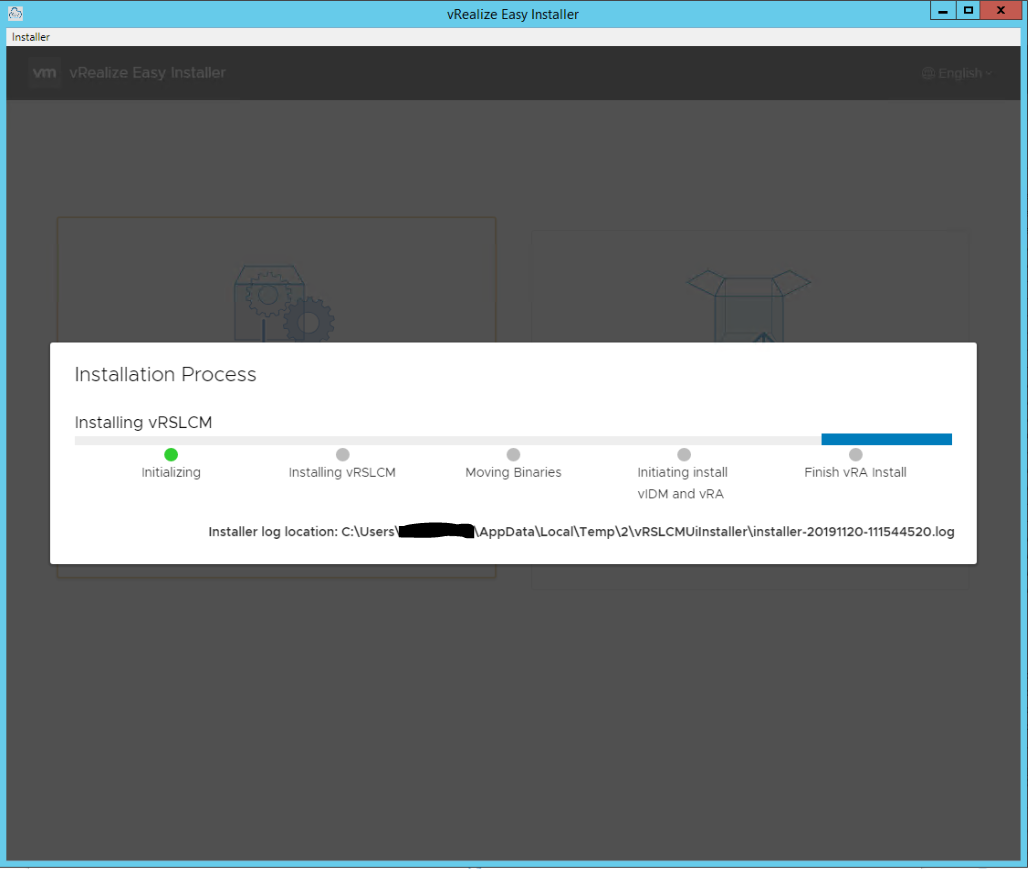
The “Installation Process” screen will show the installation progress and location of the log file
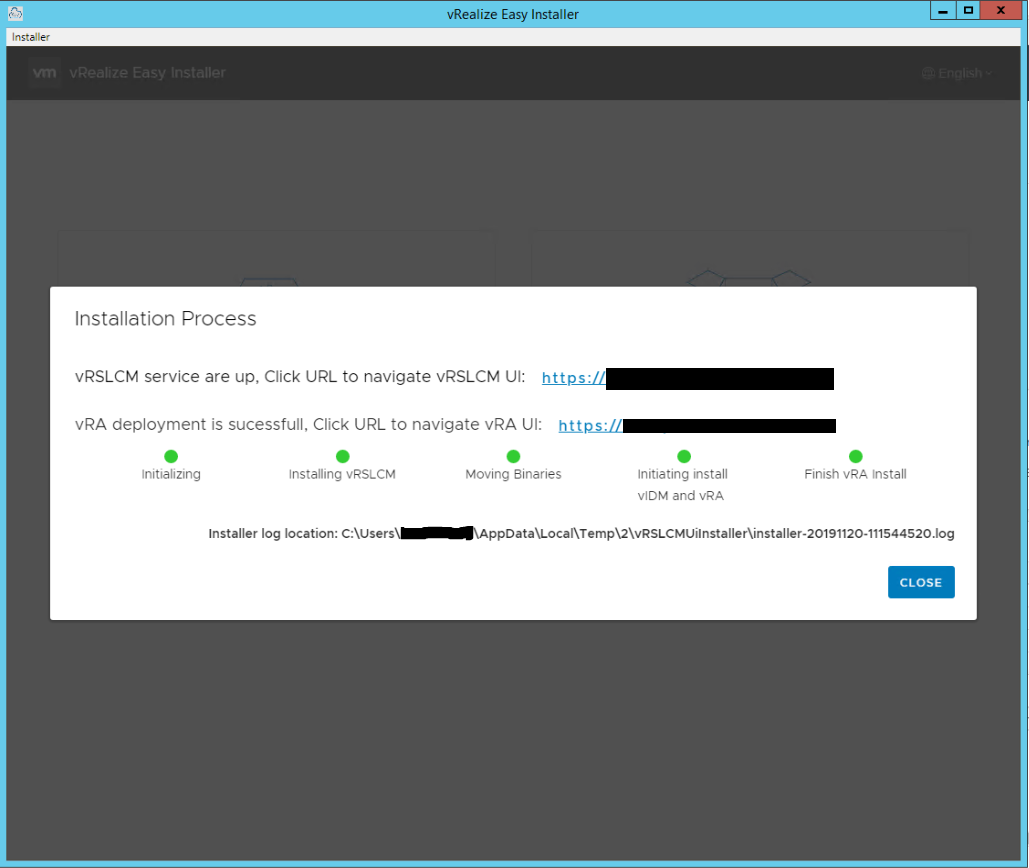
Once installation is complete the LCM and vRA URLs will be displayed, note them down and click “Close”
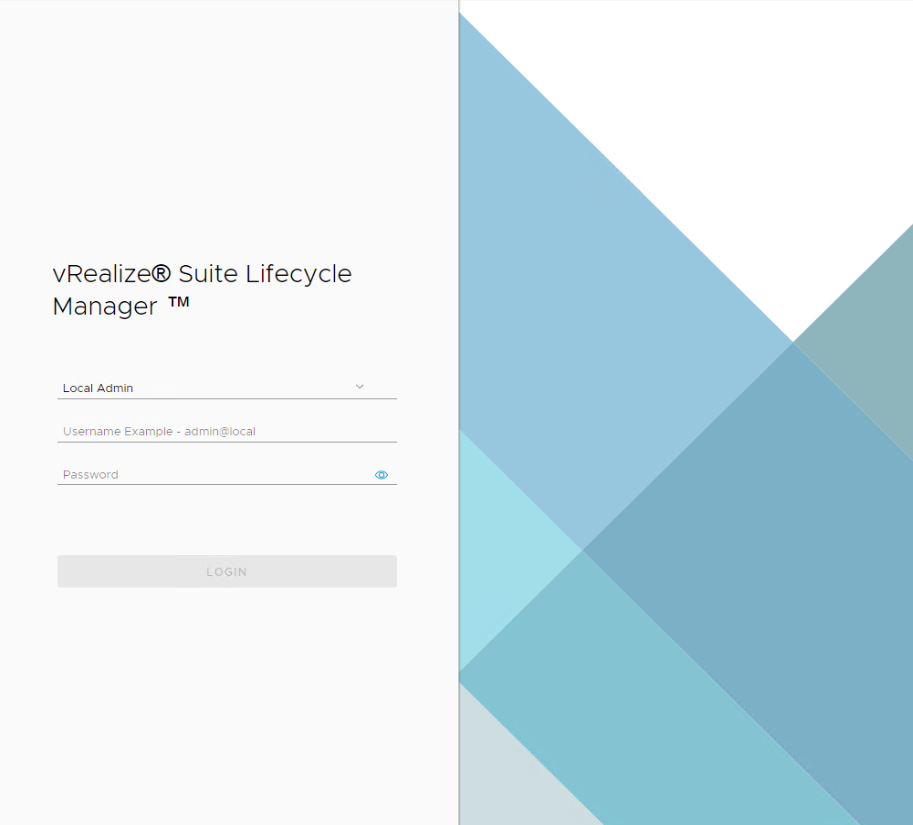
Navigating to the LCM URL will see this page displayed. Login with the credentials specified in the installer wizard
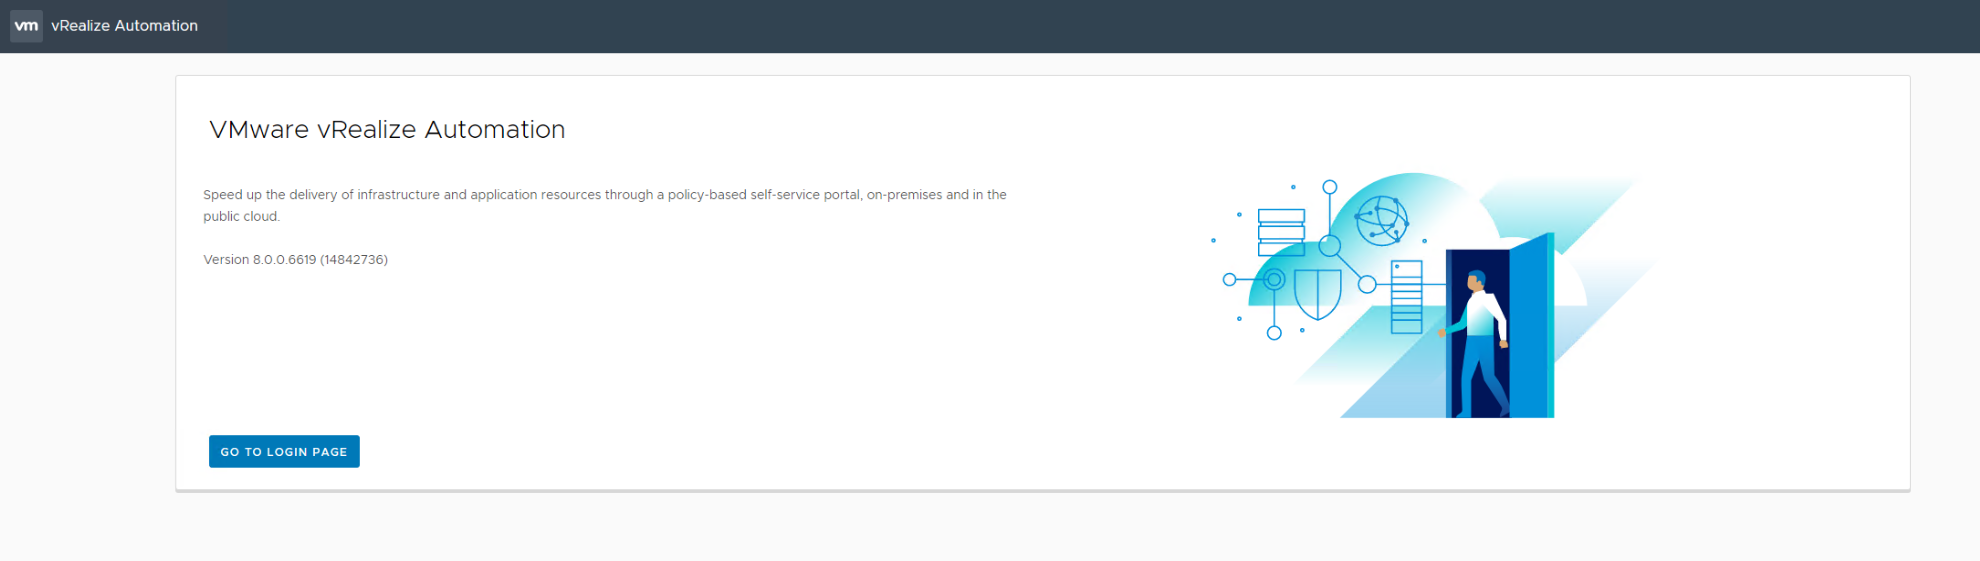
Navigating to the vRA URL will see this page displayed. Login with the credentials specified in the installer wizard
vRA 8 is now installed and ready to be configured. I will be doing more blog posts on vRA 8 as I use it more and find things worth blogging about.
Be First to Comment